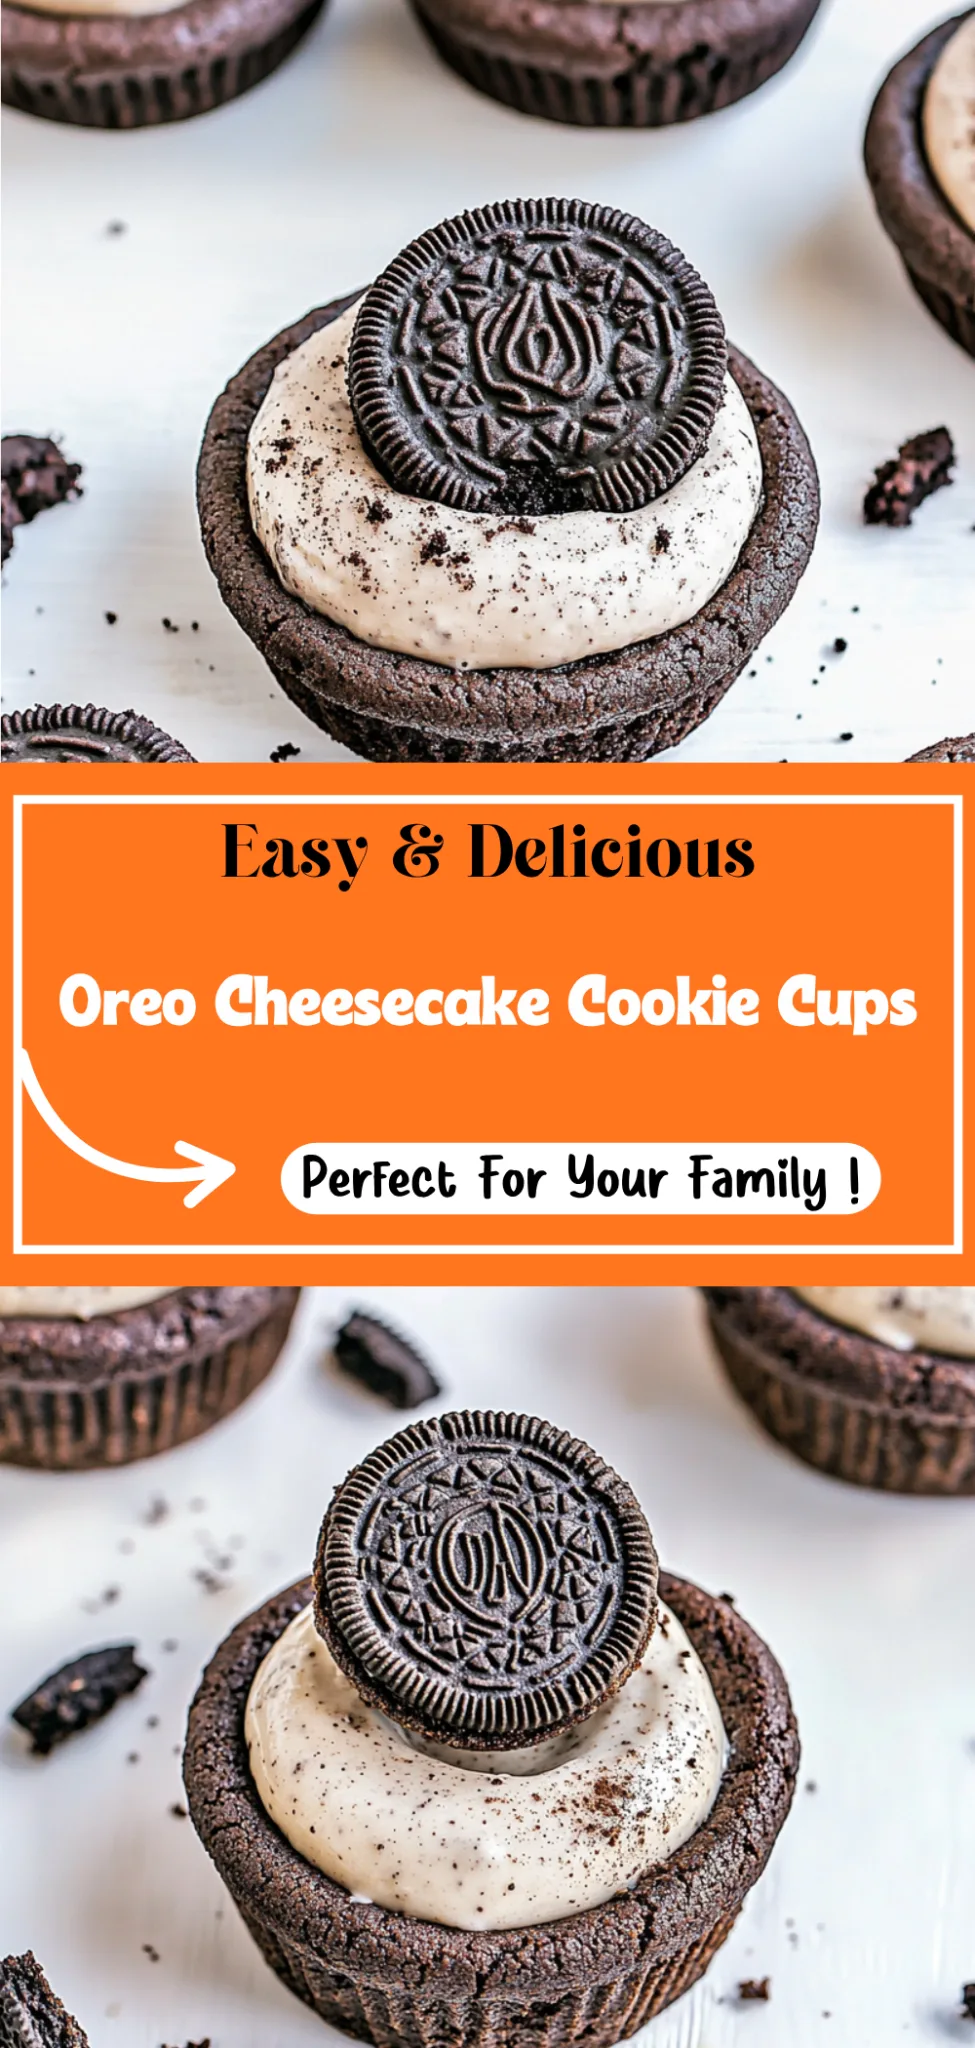
Indulging in Oreo Cheesecake Cookie Cups is like taking a delightful bite out of your sweetest dreams. With their crisp, golden cookie exterior giving way to a luscious, creamy filling studded with crunchy Oreo pieces, these treats offer a symphony of textures and flavors that dance on the palate. The rich aroma of baked cookies fills the air, creating an inviting atmosphere that’s perfect for cozy gatherings or when you simply need a little comfort.
What truly sets these cookie cups apart is the seamless blend of classic cheesecake richness and the beloved taste of Oreos, making each bite an unforgettable experience. The unique technique of baking them in muffin tins ensures that every cup is perfectly portioned, allowing for easy sharing—or enjoying all to yourself! Embrace the joy of baking and bring a touch of gourmet flair to your kitchen with these irresistible Oreo Cheesecake Cookie Cups.
Why You’ll Love This Oreo Cheesecake Cookie Cups
These Oreo Cheesecake Cookie Cups are a delightful fusion of textures and flavors that will leave any dessert lover craving more. The rich cookie base, made with cocoa powder and softened butter, creates a perfectly indulgent foundation that contrasts beautifully with the creamy, dreamy cheesecake filling enriched by crushed Oreos. With each bite, you’ll experience the melt-in-your-mouth softness of the cheesecake combined with the satisfying crunch of the cookie crust, making for a truly irresistible treat. Plus, the aroma of freshly baked cookies wafting through your kitchen is simply heavenly. Treat yourself to these delightful cups tonight; your taste buds will thank you!
What Kind of All-Purpose Flour Should I Use?
For this Oreo Cheesecake Cookie Cups recipe, you’ll want to use a high-quality all-purpose flour. This type of flour provides the perfect balance of protein content, which helps create a tender yet sturdy cookie base that holds up well to the creamy cheesecake filling. The moderate gluten development contributes to a pleasant texture without being too dense or crumbly. If you’re in a pinch and only have cake flour on hand, you can use it as a substitute by adding a little extra cocoa powder to maintain the rich chocolate flavor; however, be mindful that the cookie cups may turn out slightly softer and require reduced baking time.
What You’ll Need for Oreo Cheesecake Cookie Cups
Each ingredient in this dish plays an essential role in flavor and texture. Here’s what you’ll need:
- 1 cup all-purpose flour: Provides the structure for the cookie cups.
- 1/2 cup unsweetened cocoa powder: Infuses a rich chocolate flavor into the base.
- 1/2 cup granulated sugar: Sweetens the cookie base, balancing the cocoa.
- 1/2 cup unsalted butter (softened): Adds moisture and a tender texture to the cookies.
- 1 large egg: Binds the ingredients together and adds richness.
- 1/2 teaspoon baking soda: Helps the cookie cups rise and become fluffy.
- 1/4 teaspoon salt: Enhances all the flavors in the cookie base.
- 8 oz cream cheese (softened): Creates a creamy and rich filling for the cheesecake layer.
- 1/4 cup granulated sugar: Sweetens the cheesecake filling without overpowering it.
- 1/2 teaspoon vanilla extract: Adds warmth and depth to the cheesecake flavor.
- 1/2 cup whipped cream: Lightens the filling for a fluffy texture.
- 6 pieces Oreo cookies (crushed): Introduces delightful chunks of chocolate cookie for added texture and flavor.
How To Make This Recipe
Preheat the Oven
Preheat your oven to 350°F (175°C) to ensure it reaches the ideal baking temperature. This step is crucial for achieving a perfectly baked cookie base that is both soft and slightly chewy.
Cream the Butter and Sugar
In a mixing bowl, combine the softened butter and granulated sugar, then cream them together until the mixture is light and fluffy. This process typically takes about 2-3 minutes with an electric mixer, and it helps to incorporate air into the batter for a tender texture.
Incorporate the Egg
Add one large egg to your butter-sugar mixture and mix until fully combined. Be sure to scrape down the sides of the bowl as you go to ensure even mixing, which will help create a smooth cookie dough.
Whisk Dry Ingredients
In a separate bowl, whisk together the all-purpose flour, unsweetened cocoa powder, baking soda, and salt. This step ensures that all dry ingredients are evenly distributed before combining them with the wet ingredients, which will lead to consistent flavor and texture throughout your cookie cups.
Combine Wet and Dry Ingredients
Gradually add your dry ingredient mixture to the wet ingredients, mixing gently until just combined. Avoid overmixing at this stage; you want your dough to be cohesive but still tender.
Form Cookie Cups
Scoop the cookie dough into a greased muffin tin, pressing it down firmly to shape each cup. Make sure there’s enough dough in each cavity so that they rise slightly while baking, forming a nice cup shape for holding the cheesecake filling.
Bake and Cool
Place your muffin tin in the preheated oven and bake for 10-12 minutes until the edges are set but the centers remain slightly soft. Once baked, allow them to cool completely in the pan before removing them; this helps maintain their shape.
Beat Cream Cheese and Sugar
In another mixing bowl, beat together the softened cream cheese and granulated sugar until smooth. Aim for a creamy consistency with no lumps; this may take about 2-3 minutes using an electric mixer on medium speed.
Add Vanilla Extract
Mix in 1/2 teaspoon of vanilla extract to your cream cheese mixture until well incorporated. The vanilla adds depth of flavor that complements both the cheesecake filling and cookie base beautifully.
Fold in Whipped Cream and Oreos
Gently fold in 1/2 cup of whipped cream and 6 crushed Oreo cookies until everything is well combined. Use a spatula to avoid deflating the whipped cream too much; you want your filling to be light and airy.
Fill Cookie Cups
Once your cookie cups have cooled completely, fill each one generously with the cheesecake filling using a spoon or piping bag. Ensure each cup is filled to just above the rim for an enticing presentation.
Add Oreo Topping
If desired, sprinkle some additional crushed Oreo cookies on top of each filled cookie cup for added texture and visual appeal. This step not only enhances aesthetics but also boosts that beloved Oreo flavor in every bite.
Chill Before Serving
Finally, chill your assembled cookie cups in the refrigerator for at least one hour before serving. This chilling time allows the cheesecake filling to firm up slightly, making them easier to enjoy without falling apart when bitten into.
How to Serve and Store Oreo Cheesecake Cookie Cups
These delightful Oreo Cheesecake Cookie Cups yield four perfect servings, making them an ideal treat for sharing with family or friends. For an enticing presentation, plate them on a colorful dessert platter with a drizzle of chocolate sauce and a sprinkle of crushed Oreos on top. Pair them with a scoop of vanilla ice cream or a dollop of whipped cream to complement the rich, creamy filling and enhance the overall indulgence.
To store any leftovers, place the cookie cups in an airtight container in the refrigerator, where they will stay fresh for up to three days. When reheating, do so in the microwave for about 10-15 seconds on low power to maintain their soft cookie base without drying it out. While these cookie cups can be frozen, keep in mind that the texture may change slightly upon thawing, so it’s best enjoyed fresh.
Creamy Mashed Potatoes
The velvety texture of creamy mashed potatoes creates a delightful contrast to the rich and sweet Oreo cheesecake filling.
Roasted Brussels Sprouts
The earthy, caramelized flavor of roasted Brussels sprouts adds a savory component that balances the sweetness of the cookie cups beautifully.
Chocolate Chip Cookies
A classic treat, chocolate chip cookies enhance the chocolatey notes in the Oreo cheesecake while offering a chewy texture that complements the creamy filling.
Fresh Fruit Salad
A vibrant fruit salad made with berries and citrus cuts through the richness of the dessert, providing a refreshing burst of acidity.
Garlic Breadsticks
Buttery garlic breadsticks introduce a savory crunch that contrasts wonderfully with the smoothness of the cookie cups.
Creamy Coleslaw
The crunchy texture and tangy dressing of creamy coleslaw offer a refreshing counterpoint to the sweetness of the Oreo cheesecake cookie cups.
Frequently Asked Questions
Can I use a different type of flour instead of all-purpose flour?
Yes, you can use a gluten-free all-purpose flour blend as a substitute for regular flour. Just ensure that the blend contains a binding agent, such as xanthan gum, to maintain the cookie cup structure.
Is there a dairy-free option for the cheesecake filling?
Absolutely! You can substitute the cream cheese with a dairy-free cream cheese alternative and use coconut whipped cream instead of regular whipped cream. This will keep the creamy texture while making it suitable for those avoiding dairy.
Can I make these cookie cups ahead of time?
Yes, you can prepare the cookie cups in advance and store them in an airtight container at room temperature for up to two days. Just wait to fill them with the cheesecake filling until you’re ready to serve to keep them fresh.
How can I tell when the cookie cups are done baking?
The cookie cups are done when they have risen slightly and look set around the edges. A toothpick inserted into the center should come out mostly clean, with just a few crumbs clinging to it.
Can I add other flavors to the cheesecake filling?
Definitely! You can mix in flavors like mint extract or almond extract for a twist. Additionally, feel free to fold in other crushed cookies or even chocolate chips to enhance the flavor profile.
Final Thoughts
These Oreo Cheesecake Cookie Cups are not just a dessert; they’re a delightful treat that combines the beloved flavors of Oreo and creamy cheesecake in an adorable, shareable form. If you enjoyed this recipe, be sure to try out other delicious sweets like [Mini Chocolate Lava Cakes] or [No-Bake Strawberry Cheesecake] for more indulgent moments. We’d love for you to save this recipe on Pinterest, follow along for more sweet inspirations, and share your cookie cup creations with us in the comments!

Leave a Comment